How to Connect Nibomo to ChatGPT with MCP
To connect Nibomo to ChatGPT, add its MCP server as a custom plugin, then sign in to your Nibomo account. Both steps matter: Nibomo can appear on ChatGPT's Plugins page before sign-in is complete.
The connection uses MCP, a standard that lets an AI assistant use another app's tools. You enter a server address, authorize access, and ask ChatGPT to work with your flashcards in ordinary language. No coding is required.

This setup uses ChatGPT's Developer mode. You'll add Nibomo directly using its server URL.
Verification note: We captured the setup screens on September 20, 2026, and saved the custom plugin entry. The sign-in popup didn't open in our embedded browser, so we couldn't complete OAuth or test authenticated tool calls. The prompts below explain how to check your own connection; we haven't verified card creation through this setup.
Open the custom plugin form
You'll need a Nibomo account and a ChatGPT account or workspace with access to custom MCP connections. If you haven't used Nibomo yet, follow the getting-started guide first so you have a workspace to select.
In ChatGPT, open Settings → Security and login → Developer mode and enable it. Then open Plugins and use the + button or Create app entry to add a connection. The form in our session was titled New Plugin. OpenAI documents this flow in its Connect to ChatGPT guide.
Availability and labels can vary by account and workspace. If Developer mode or the creation option is missing, check the official guide and your workspace's restrictions.
Fill in the form:
| Field | Value |
|---|---|
| Name | Nibomo |
| Description | Read, write, and review your flashcards with spaced repetition. |
| Connection | Server URL |
| Server URL | https://mcp.nibomo.com/mcp |
| Authentication | OAuth |
Use the full address, including the final /mcp. The description is optional; it's there to make the connection recognizable later. You don't need to generate an API key for this OAuth setup.
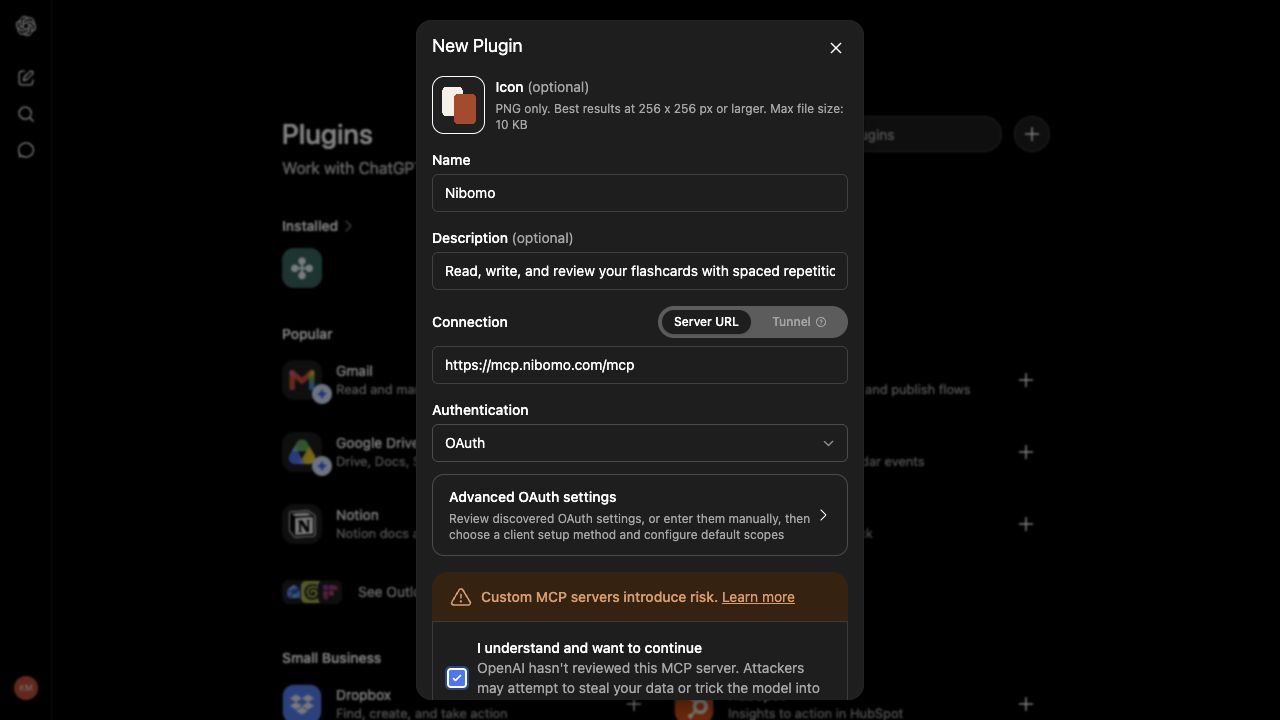
Read the custom-server warning, acknowledge it if you want to proceed, and click Create. The button is below the area shown in the screenshot. This adds your custom connection; it doesn't mean Nibomo has been reviewed or listed in OpenAI's public directory.
Finish signing in to Nibomo
At Add Nibomo to ChatGPT, select Sign in with Nibomo and complete the authorization flow using the Nibomo account that holds your cards.
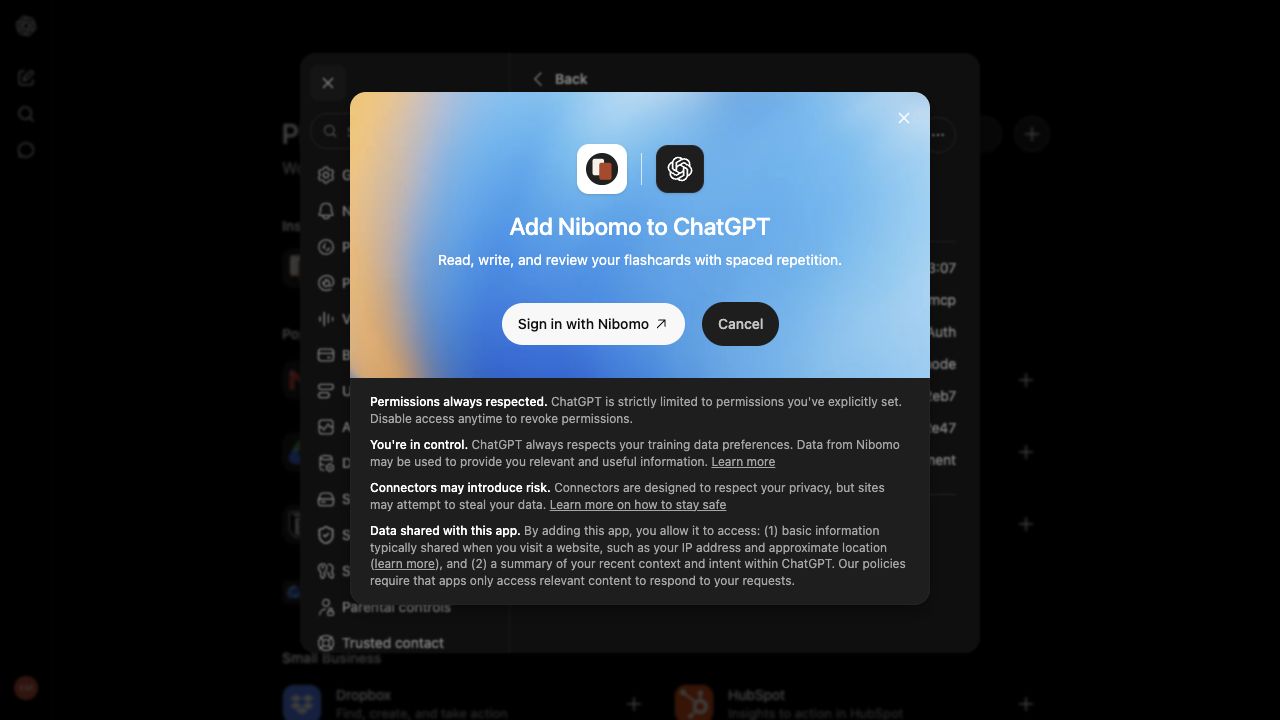
Nibomo's authentication service uses auth.flashcards-open-source-app.com. Seeing that hostname during sign-in is expected, even though the MCP address uses mcp.nibomo.com.
If no sign-in window opens, try the flow in your regular browser. To restart sign-in, open Nibomo → Plugin actions (…) → Manage → Connect another account. Use the workspace check below to confirm that ChatGPT can access your account.
Decide when ChatGPT should ask permission
In Settings → Plugins → Permissions, the screen we captured offers Always ask, Allow read actions, and Allow low-risk actions.
Choose Allow read actions to let ChatGPT list workspaces and read cards without asking, while still requiring approval for changes. Choose Always ask if you also want to approve reads.
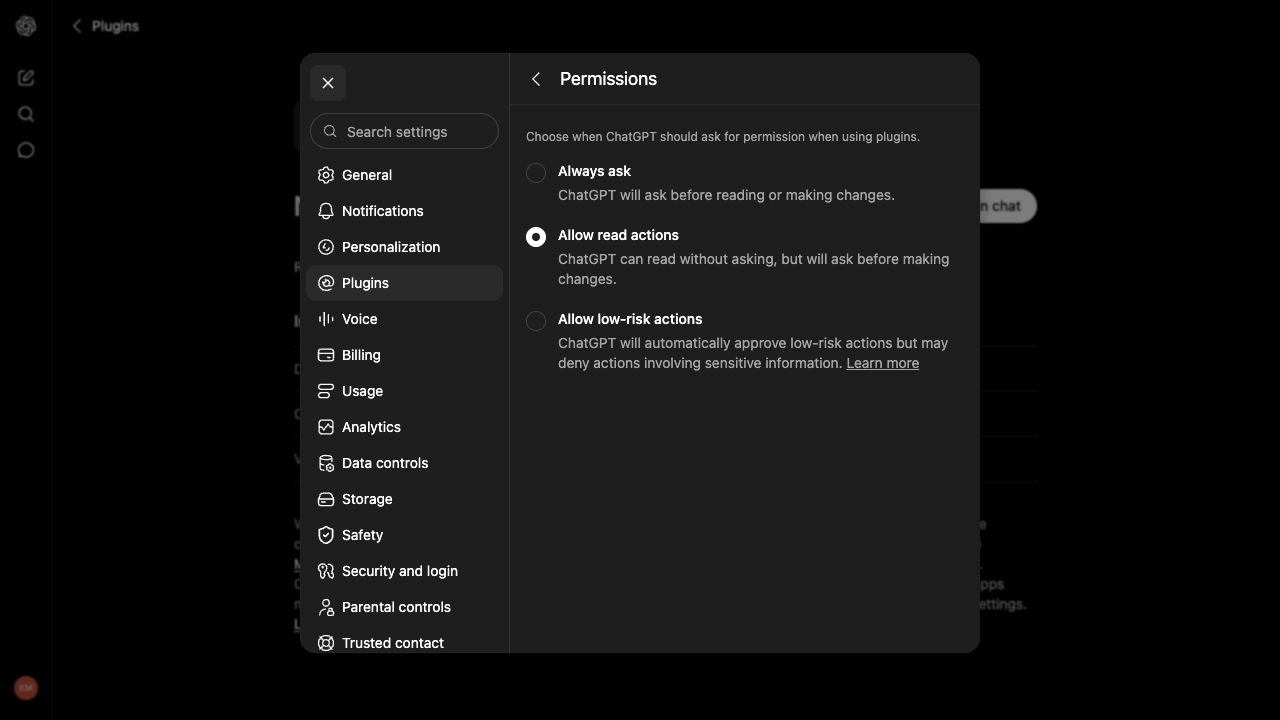
This is a global plugin setting. Changing it affects other plugins too; it isn't a permission switch only for Nibomo.
For Nibomo, listing workspaces, reading cards, fetching instructions, getting the next review question, and revealing an answer are read actions. Creating or editing cards and submitting a review are writes. You may see tool names such as list_workspaces, sql_query, or sql_execute in ChatGPT's activity, but you don't need to write SQL yourself. The MCP connector documentation describes the interface.
Check the connection with one card
Open a chat with Nibomo selected. Start with a request that changes nothing:
Use Nibomo to list my workspaces. Don't create or change anything.
Check that the returned workspace names belong to your account. If ChatGPT can't call Nibomo or asks you to connect an account, return to sign-in. Once the workspace list works, choose the destination explicitly before saving anything.
Next, ask for a draft:
Draft one flashcard about HTTP 404. Put only a question on the front and the answer on the back. Show me both sides before saving anything.
A suitable card would be:
| Side | Content |
|---|---|
| Front | What does HTTP status code 404 mean? |
| Back | The server couldn't find the requested resource. For example, the URL may point to a page that doesn't exist. |
Once you're happy with the draft, name the destination:
Save this one card in my [workspace name] Nibomo workspace. Don't create any other cards.
Check the card and workspace in ChatGPT's approval request before allowing the write. Then ask ChatGPT to read the saved card back. Open Nibomo on the web or your phone with the same account, select that workspace, and let it sync. Find the card and check both sides there to confirm it was saved correctly.
If the connection still won't work
Check the configured URL first: https://mcp.nibomo.com/mcp. The older MCP hostname still works, but if you change an existing connection to the new address, sign in again. Authorization tokens are tied to the server address.
If ChatGPT reports a failed save, ask it to read the workspace before trying another write. That helps you avoid creating a duplicate when the result of the first attempt is unclear. If the card exists remotely but hasn't appeared on your phone, check the account, workspace, and sync state there.
After this one-card check, you can use the same draft-and-approve process for your own study material. The guide to making flashcards with ChatGPT covers choosing useful questions and keeping each card focused.